Fusion Landscaping®
A Fusion Landscape® is designed to thrive in natural surroundings by fitting into a property’s natural shape, slope, and contours.
These key elements bring a Fusion Landscape to life:
- Planting the right plant in the right place
- Trees and shrubs for height and shade
- Permeable pavers that let rainwater seep back into the soil
- High-efficiency sprinkler heads and rain barrels
Need some landscape design inspiration?
Refer to these full sun, full shade, and driveway border scaled drawing examples to help you get started:
Consider a Fusion Landscape Professional
Looking for professional help? A Fusion Landscape Professional can assist you in bringing your landscape to life. These certified professionals have advanced industry knowledge and experience and can help you create beautiful landscapes with elements that manage rainwater where it falls, using rainwater as a resource. To learn more about Fusion Landscaping, visit fusionlandscapeprofessional.ca.
A successful Fusion Landscape begins with a solid plan and a detailed design.
Planning your Fusion Landscape
Have a plan before you start digging.
Begin by taking a good look at your outdoor space to see:
- How the sun, shade, wind, and snow impact your home and garden.
- Which areas are most impacted by the elements.
- If water collects in a particular location during heavy rainfall.
- If there's a slope that gets very wet (or dry).
- If the is soil hard or soft.
This video shows how to keep your garden beautiful without using too much water:
Designing your Fusion Landscape
Follow these 3 steps to design your Fusion Landscape:
Step 1: Draw a rough sketch.
Start with a rough sketch of your property or the area where you want your Fusion Landscape.
During this step the sketch doesn't need to be to scale, but be sure to include:
- Any permanent features that are staying in place, such as an outdoor cooking area, a vegetable garden, a kids' play area, or large trees.
- Any areas paved with concrete, brick, or stone pavers such as a patio or around a pool.
Step 2: Measure everything.
Measure any permanent items or spaces such as sheds, decks, gardens, and grassy areas, as well as any new proposed spaces. Make sure to note the length, width, and depth. Note each measurement on the sketch.
Note the location of windows and doors for views and traffic patterns, and also where water faucets and electrical outlets are placed.
Step 3: Transfer your map to graph paper.
Print out a graph paper worksheet.
This scaled drawing will become your master copy. Note the natural lighting (sunlight and shade), wind-prone areas, sloping, and areas where water pools.
Remember to refer to our Fusion documents before starting to build.

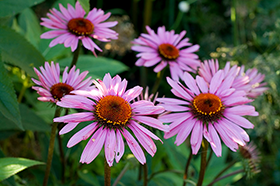
Add depth, warmth, and texture to your Fusion Landscape by planting the right plants, flowers, and foliage in the right place.
Sunlight exposure
Watch how the sun moves through your outdoor space throughout the day.
The sunlight exposure in your outdoor space will affect your landscape's design as well as the plants you choose.
Plant tag symbols
The information on a plant's tag tells you:
- How big the plant will get.
- When it will bloom.
- How much space it needs between it and other plants.
- How much sunlight it needs:
- Full sun – requires 6 or more hours of direct sunlight per day
- Part sun and part shade – requires 3-6 hours of full sun each day
- Shaded – requires full shade or less than 3 hours of sun each day
Rainfall
After a rainfall, see if there are any areas where water is pooling. Note any sloped areas where water flows away more quickly. These areas are likely to be drier.
Planting tips
Carefully read plant tags
The plants and flowers you buy from a nursery or garden centre will be tagged or labelled.
This information is key for knowing how much sunlight or shade or water your plant will need.
Reference our full list of Fusion plants to help you choose plants that are similar to your landscape's growing conditions.
Place certain plants together
Some plants need more water than others.
Placing plants with similar watering needs together will save time and money. It will also help you avoid excess watering: there's no reason to water an entire garden during dry periods if only some of the plants need it.
Relocate some plants when necessary
As your plants grow, your landscape might change. There might be less sunlight and more shade in certain areas, or you might install a new irrigation system.
If this happens, you can relocate perennials to a more suitable area of your landscape. Many perennials can be split, giving the original plant more space to spread out its roots.
Soil is the dirt that nourishes your plants.

Different types of soil
The type of soil in your outdoor space will affect how your plants grow and how often you need to water them.
Loamy soil
Loamy soil is the most ideal. The water it contains for growing plants drains very well.
Clay soil
Clay soil is very dense. It doesn't contain many pockets for air or water to circulate. Clay soil drains very slowly, often holding onto water too long. Once it's dry, the clay can harden.
Sandy soil
Sandy soil is very loose. The pockets for air and water are so large that the plants won't absorb water fast enough. Sandy soil dries out very quickly.
Identifying the type of soil
You can tell which type of soil you have by doing a soil test at home.
Begin by taking a handful of moist — but not wet — soil from your garden.
Give the soil a firm squeeze, then open your hand.
One of 3 things will happen after you open your hand:
- The soil holds its shape, and when you lightly poke it, it crumbles. This means the soil is loam.
- The soil holds its shape, and when you lightly poke it, it sits stubbornly in your hand. This means the soil is clay.
- The soil falls apart as you open your hand. This means the soil is sandy.
If the soil is clay or sandy, you can improve it by adding compost. Compost not only adds nutrients to the soil, but also helps to lighten heavy clay soil and bind loose sandy soil.
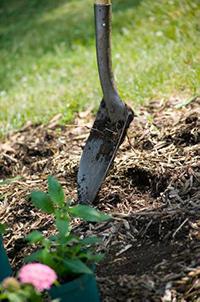
Mulch is a thick layer of material placed over the soil and around plants. It acts as a protective cover for the soil.
A 3- to 4-inch (8-10 cm) layer of mulch is recommended. This amount not only gives your landscape a finished look, but also:
Reduces weeds.
Bare soil is a perfect spot for weed seeds to blow in and germinate.A layer of mulch will help keep weeds out of your Fusion Landscape.
When bare soil is covered with mulch, most weeds will never be able to come into contact with the soil.
Helps retain moisture.
Mulch will keep your soil cooler, which stops it from drying out quickly.A consistent level of moisture in your soil is a big part of growing healthy plants. Mulch improves the water efficiency of your Fusion Landscape so much that you can often rely on rainfall alone.
Adds nutrients back into your soil.
Mulches made from other organic materials, such as shredded wood or bark chips, can improve the soil as they break down.Mulch that breaks down naturally over time will add nutrients back into your soil.
This video shows how to save water, prevent moisture loss, and have fewer weeds by using mulch:

Fusion Landscapes typically require less water than traditional gardens. This means less time spent watering and less maintenance.
To give your Fusion Landscape the right amount of water:
- Watch for signs.
If you've used a layer of mulch, rainfall should be enough to get your plants through the year. When their leaves look slightly limp or are perfectly upright, your plants are telling you it's time to water. - Do a moisture test.
Stick your index finger into the soil. If it feels slightly cool and damp, watering isn't necessary. If it feels dry, then your plants might need a drink. Check the weather, and if rain is in the forecast, let Mother Nature do the watering for you. - Use a watering can or hose.
When you need to water, use a watering can or hose with a shower setting to water the base of your Fusion plants. Water only the root of the plants since that's the part that needs the water most. - Plant the right plants in the right places.
Placing your plants where they'll get their proper sun exposure will help your landscape flourish and require less water. - Water your new plantings for the first 4-to-6 weeks.
After For the first few weeks after planting, water every 2 to 3 days unless it rains. Use a rain barrel to collect rainwater, then reuse the collected water around your property.