Using messages with your Children’s Services account
If you don’t have a Children’s Services account, you need to create an account before you can use messages.
Steps to use messages
1. Sign into your Children’s Services account
2. Select messages:
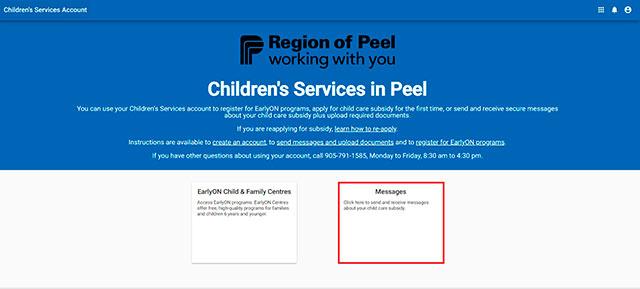
3. Select “New Message”

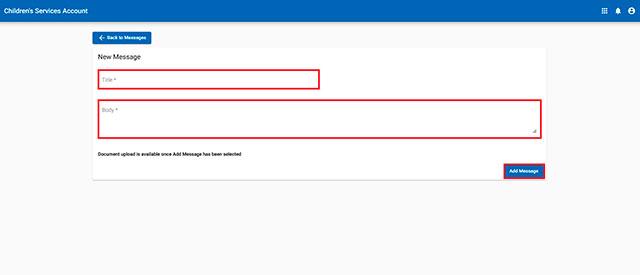
4. Add a title in the Title section and your message to the Body section. You cannot send a message unless a title and body are added. After you add a title and body, select “Add Message” to send your message
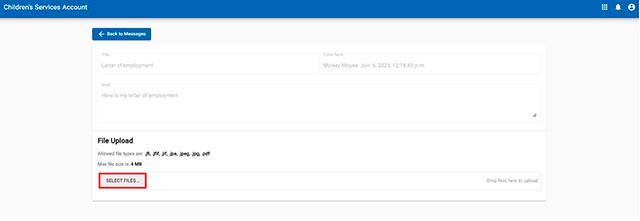
5. After you “Add Message”, you can upload a document by selecting the “Select Files” button
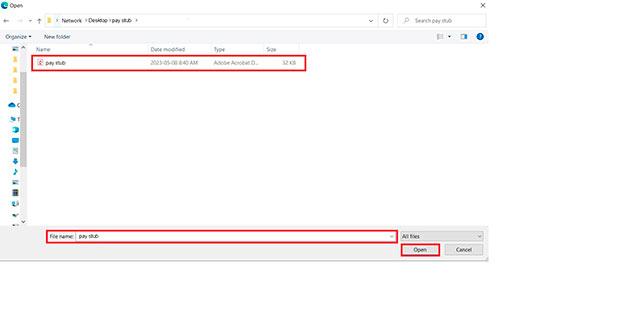
6. Choose the file you want to upload and select the “open” button
Tip: File types you can upload are .jfi, .jfif, .jif, .jpe, .jpeg, .jpg, .pdf and the max file size is 4 MB
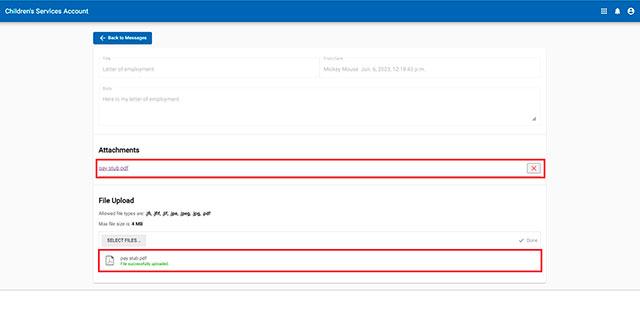
7. After selecting Open, the document link appears under Attachments. “File successfully uploaded” also temporarily appears under the File Upload heading
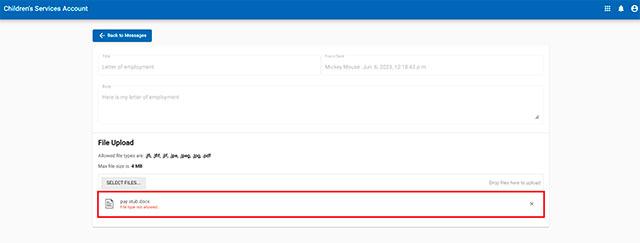
Tip: If the file type is not allowed or the file size is too large “File type not allowed” or “File size too large” appears under the File Upload heading
8. Select Back to Messages

9. This page lists all your messages. An icon will show if there is an attachment and the check box under “Read” lets you know if your Children’s Services Worker has opened your message.

If the "Read" box is unchecked, the message has not been opened.
10. When your Children’s Services Worker responds, the bell icon will appear with a “1” to show there is a new unread message (or a “2” if there are 2 unread messages, etc.)

Any new messages will also be in bold until you open it.
Tip: You will also receive an email from noresponse@missioninc.com letting you know you have a new message in your Children’s Services account.